Table of Contents
ToggleWhether you’re customizing jewelry, adding detail to gun stocks, or creating personalized metalwork, hand engraving tools transform blank metal into intricate art. Unlike power tools that rely on electricity or compressed air, hand engraving demands precision, control, and the right equipment in your palm. For hobbyists and craftspeople alike, understanding which tools suit your project, and how to use them safely, separates stunning, professional-looking results from frustrating mistakes. This guide walks you through the essentials, helping you build a toolkit that fits both your skill level and your vision.
Key Takeaways
- Hand engraving tools offer total control over depth, angle, and line quality, producing museum-grade metalwork without expensive rotary machines.
- Beginners should start with a basic kit of 5–10 chasing punches and 4–6 burins (line, spit, and specialty shapes) ranging from $60–$150, prioritizing quality over quantity.
- Soft metals like brass and copper are ideal for learning hand engraving, while steel requires sharper, hardened burins and more effort.
- Proper maintenance—including regular sharpening with 8,000–10,000 grit stones and dry storage in a dedicated tool roll—keeps hand engraving tools sharp and prevents costly damage.
- Always wear eye protection and cut-resistant gloves when using hand engraving tools, as slips on metal can cause serious injury.
What Are Hand Engraving Tools and Why They Matter
Hand engraving tools are chisels, burins, and punches struck by hand (or light mallet) to cut or displace metal. Unlike automated or rotary engraving, hand tools give you total control over depth, angle, and line quality, critical for ornamental work, repairs, or one-of-a-kind custom pieces.
These tools matter because they’re forgiving and affordable to start with. A quality hand engraver can produce museum-grade work without a $5,000+ rotary machine. They’re also portable, require minimal setup, and work on any flat surface. Plus, hand-engraved pieces command respect in metalworking circles, there’s no substitute for the human touch and years of skill that go into each mark.
Essential Hand Engraving Tools for Beginners
Chasing and Repoussé Tools
Chasing and repoussé tools are blunt or shaped punches designed to displace metal without cutting it. Chasing works the front of the metal (pushing inward), while repoussé works from the back (raising details outward). These tools come with handles and working ends in dozens of shapes: rounded balls, lined stamps, and matting punches for texture.
Beginners should start with a basic set of 5–10 chasing punches, plus a chasing hammer (a specialized, lightweight mallet weighing 8–12 ounces). A good starter set, like those found on Instructables project pages, costs $30–$80. You’ll also need a steel block (a flat, hardened steel surface) to rest your metal on, a 4×6 inch block works fine. Stainless steel bench blocks are durable and won’t mark easily.
When using chasing tools, always wear eye protection (safety glasses or a clear face shield) and consider leather gloves to protect your non-hammer hand. Strike steadily, not violently: control beats force every time.
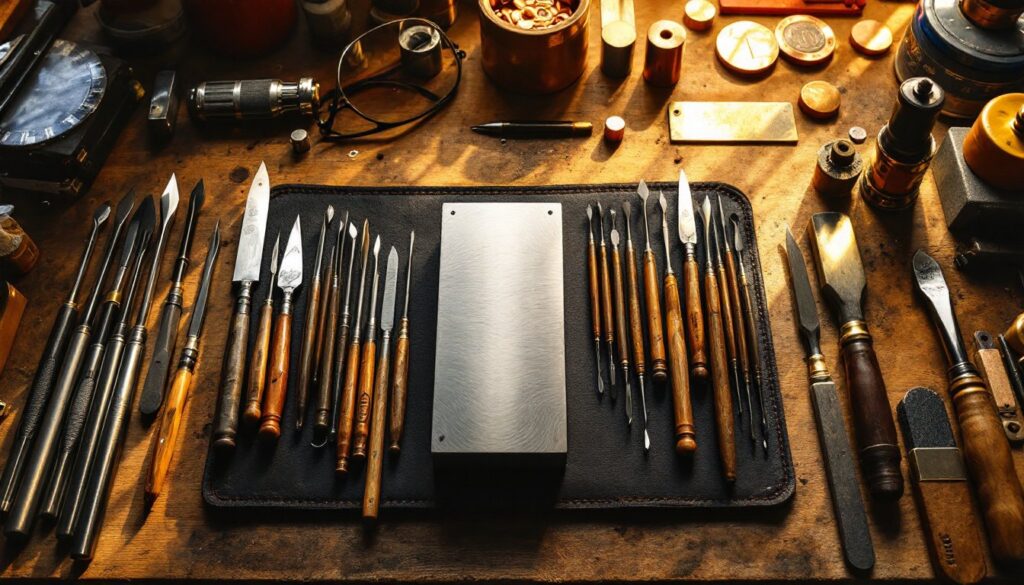
Burins and Gravers
Burins and gravers are sharp cutting tools that slice lines into metal, creating the fine detail engraving is famous for. They come in multiple profiles: line (straight, thin cuts), spit (fine points for jewelry), and bulino (wider, curved blades for shading). The shaft is usually 3–4 inches, fitted into a wooden or ergonomic handle.
Unlike chasing tools, burins cut metal, so they require sharper angles and more deliberate strokes. A starter set of 4–6 burins (line, spit, and a couple of specialty shapes) runs $50–$150. Quality matters here, dull or soft-steel burins won’t hold an edge and will frustrate you quickly. Reputable makers like Gravers, Inc., and GRS Tools publish free sharpening and technique guides.
When working with burins, you’ll push them (not strike with a hammer), so a bench pin or engraving block keeps your metal secure while you anchor the burin handle against your chest or work surface. Wear cut-resistant gloves on your holding hand and keep your fingers behind the cutting edge, slips happen, and metal is unforgiving.
Selecting the Right Tools for Your Projects
Choosing tools depends on your project type and your budget. If you’re personalizing a knife or adding initials to a small plaque, a simple line burin set and a bench pin will get you started. For broader, textured work, belt buckles, gun work, or architectural inlay, invest in chasing tools and a full range of gravers.
Consider your metal, too. Soft metals like brass, copper, and aluminum accept both chasing and cutting beautifully. Hard metals like steel require sharper tools and more effort: some engravers reserve hardened steel burins for steel work alone. Mechanical Workshop Tools and Woodworking Tools for Home Workshop often overlap in a serious maker’s space, both demand precision and quality equipment.
Start small and add tools as your skills and projects evolve. Buying a $200 deluxe set when you’re not sure you’ll stick with engraving is wasteful. A $60–$100 beginner kit from a reputable toolmaker, combined with practice on test pieces, lets you learn without buyer’s remorse. Resources like Popular Mechanics often feature beginner metalworking projects that teach you what tools you’ll actually need.
Maintenance and Care for Long-Lasting Performance
Hand engraving tools are investments. Proper care keeps them sharp, safe, and ready to perform.
Sharpening is the most critical task. Burins and gravers dull quickly, dull tools require excessive pressure, leading to hand fatigue and mistakes. Use a fine-grit sharpening stone (8,000–10,000 grit) or stropping compound on leather to maintain edges between deep sharpening sessions. Never let your burins rust or corrode: store them in a dry place, ideally wrapped in cloth or a dedicated tool roll. Chasing tools need less frequent sharpening but benefit from occasional honing.
Handle maintenance matters too. Wooden handles can crack or splinter: treat them with linseed oil occasionally and replace them if they’re damaged. Never strike a damaged handle, splinters and structural failure risk injury.
Store your tools in a dedicated box or roll, separated so they don’t bang against each other and dull their edges. Label your tools if you have multiple sets, especially if working in a shared shop. Protect your investment: a $15 tool roll or wooden box prevents $300 in damaged tools.
Conclusion
Hand engraving tools unlock precision metalwork that power tools can’t match. Start with a modest kit, learn on soft metals, and master the fundamentals before expanding. With patience, the right tools, and genuine care for your equipment, you’ll create work that lasts generations, and feels unmistakably handmade.